
Hello and welcome to the world of bodyweight training with parallette bars!
Ready to L-Sit?
Pick your heavy duty parallettes or lightweight parallettes here.
You've decided it's time to spend some time on the little cousin of parallel bars, and naturally a rush of excitement coupled with a shiver of anxiety takes you over. I have a new toy! But how on earth do I use it?
Have no fear- if you aren't sure of where you can go with the parallettes just yet, you will be by the end of this article. We have you covered.
And if you need a shiny new set of parallette bars, we have two different styles to choose from.
- Our heavy duty parallettes – a calisthenics bodyweight training essential. These are hand crafted and made for the last long enough to equip your great grandkids
- Our lightweight parallettes are a push-up bar and paralletes hybrid that are designed for portability and quick assembly. Their lightweight profile makes them easy to take anywhere.
So, as we have already mentioned, parallettes are the low and portable relative of the parallel bars you see in gymnastics. If you want to know where you can end up one day on the parallettes, all you would have to do is look at what gymnasts can do in their routines above the bars and on the rings and work out what you can manage without being feet off the ground. When you take a closer look at those routines and factor in the compact nature of parallettes, you end up finding yourself predominately in the world of handstands, L/V-sits and planche. It should come as no surprise, then, that parallettes are a gold mine of pushing gains. The moves listed here are some of the most impressive in both gymnastics and calisthenics worlds.
Let me guess- "But I'll never be able to do those moves like Frank Medrano! You've got to be joking!"
We all start in that boat. So did the athletes in the videos you've likely seen. The trick to getting there is starting somewhere achievable for you now and slowly doing a little more than the day before until you've reached your destination. Simple enough, right? It's easy to say it's simple- but what are the progressions and how to we develop towards them in a way that we can be sure we are doing a little more? Well, let's have a look and find out.
Before we get into the progressions themselves, we have to warm ourselves up.
To warm up for this session We recommend the following exercises:
Wrist Raises:
- Start in a quadruped position with your knees on the ground and your hands under your shoulders with elbows locked out and your elbow pits facing forwards, fingers fanned out and index fingers parallel. Add more weight into this movement and make it more challenging by leaning the shoulders further over the wrists.
- Keeping your elbows locked and externally rotated (elbow pits forward), put your weight into the base of your index fingers and bring the palm of your hand as high as possible off the floor.
- Lower down with control to return to the start position. Repeat for 15-30 repetitions, 3 rounds.
Dolphin Wrist Pushups:
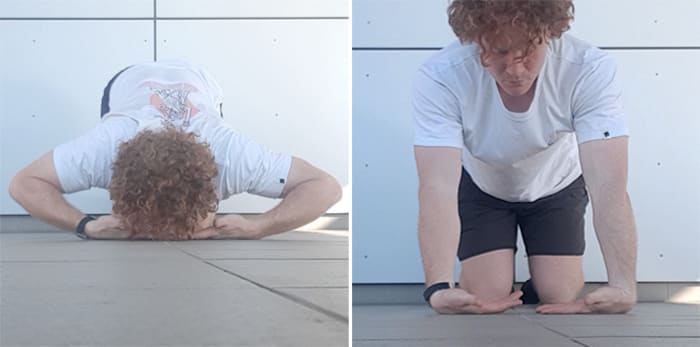
- Start in a quadruped position with your knees on the ground and your hands under your shoulders, palms up with middle fingers facing inwards towards each other.
- Bend at the elbows while keeping as much weight in the hands as is possible (and not completely excruciating, while still being uncomfortable). Touch your nose to the ground to find the bottom position.
- Extend and externally rotate (face elbow pits forward) the elbows to lock out or extend as much as possible. Repeat for 10-20 repetitions, 3 rounds.
Wrist Rolls:
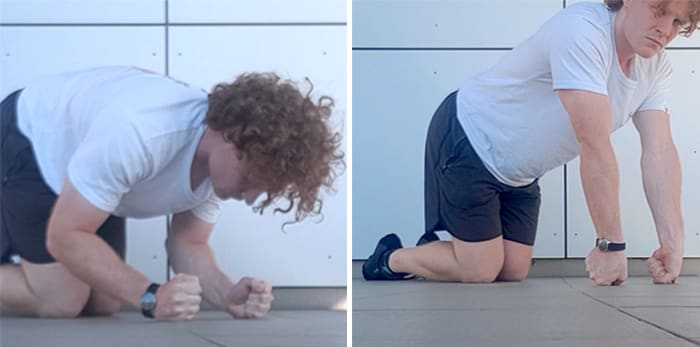
- Start in a quadruped position with your knees on the ground and your hands under your shoulders, balled up in a fist and knuckles facing in towards each other.
- Roll into the index finger and thumb side of your fist, leaning weight into the inner side of your forearm.
- Return to the start position, bend your elbows slightly and roll into the pinkie side of your hand to get weight into the outside of your forearm. Return to the start position. Repeat for 10-20 repetitions, 3 rounds.
RubberBanditz Heavy Duty Parallettes
$69.95
- Heavy Duty Parallette Bars
- 23 x 15 x 15 inches with a 1.5 inch diameter tube
- Ideal for L-sits, dips, push ups, handstands, planche progressions and more
Chest To Wall Handstand:
- Start by having your fingertips facing away from a wall, roughly 20 inches (50cm) away from the wall.
- Step your feet up as high as you can on the wall. At this point you should be at a 45-50 degree angle. If this is as far as you can comfortably go, tuck your hips under and shorten the gap between the ribs and hips. Push the shoulders high and the hands into the ground hard.
- If this is manageable, walk your feet up the wall and hands in towards the wall until you are in a chest-to-wall position. Tuck your hips under and shorten the gap between the ribs and hips. Push the shoulders high and the hands into the ground hard. Repeat for 30-60s, 2 rounds.
Hang:
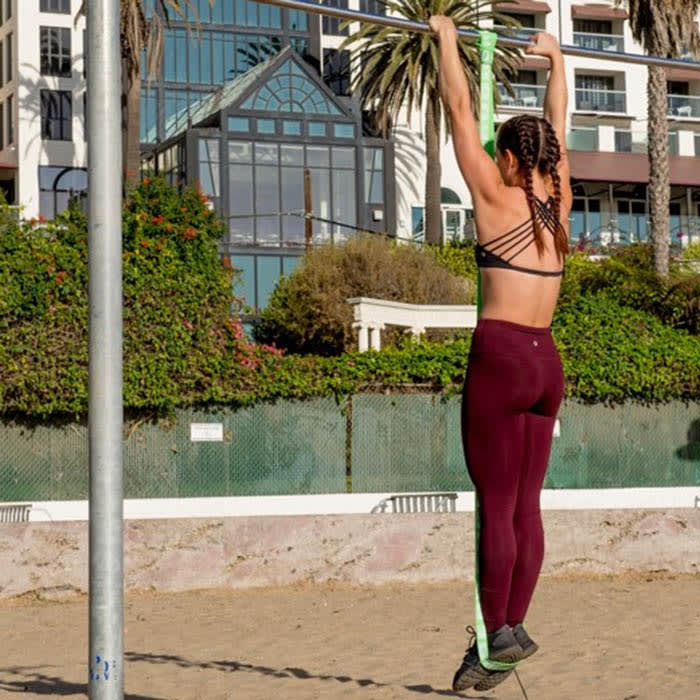
- Grab a bar, feet hanging off the ground.
- Relax into the shoulders as much as possible.
- Hang for rounds of 30-60s, 2 rounds. We recommend using one of our resistance bands for additional support if you can’t hang for at least 30 seconds on your own.
V sit progressions:
The V-sit (and later, the manna if you are amongst the elite) is an exercise that thrashes the triceps, shoulders, chest and abs. As the V becomes higher, it demands more shoulder extension, triceps strength, chest strength, scapular depression strength and compressive ab strength. While it demonstrates an amazing amount of strength, it begins with the N-sit: a humble exercise that is achievable for so many straight away, yet still a silent assassin. From here we work towards single leg L sit, to L sit and their elevated relative, the v-sit.
When performing any of these variations, it is important to push your shoulders down and back towards your back pockets, as well as aiming to keep the gap between the top of your hips and your ribs as short as possible. Elbows and knees should also be locked out throughout the movement, and elbow pits should face forwards.
N sit instructions:
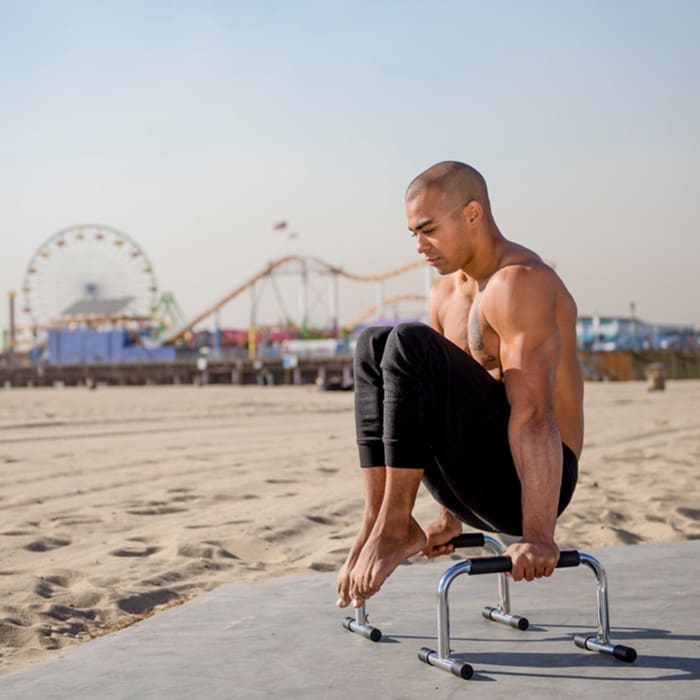
- Start with your hands gripping the parallette bars, feet in front of you on the ground. Push down into the parallettes at all times, keeping your shoulders away from your ears.
- Bring one foot off the ground, and slowly peel weight off the remaining foot as necessary. Keeping your arms straight, lean back slightly.
- If possible, bring the second foot off the ground. If not, find a position with one foot on the ground that you can manage for no more than 10 seconds.
Half-lay L-sit Instructions:
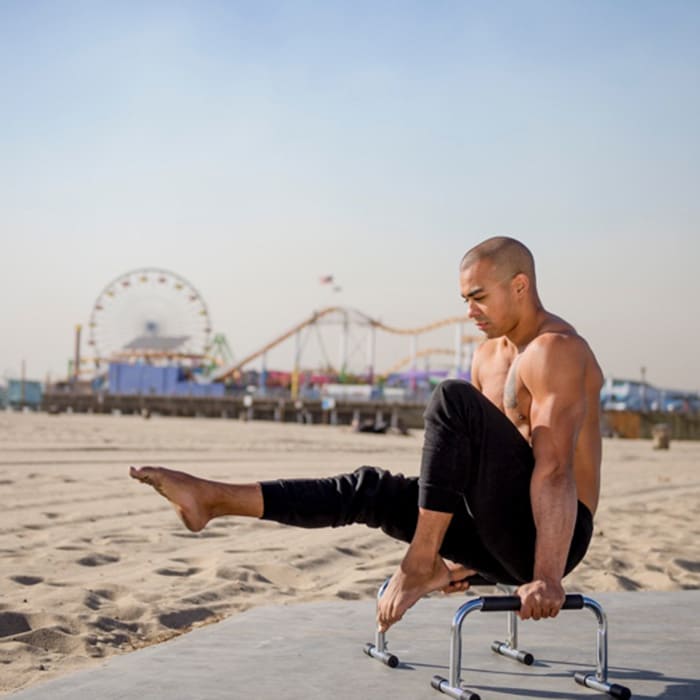
- Start with your hands gripping the parallettes, feet in front of you on the ground. Push down into the parallette bars at all times, keeping your shoulders away from your ears.
- Bring both feet off the ground into an N-sit position.
- Maintaining the same shoulder position, extend one leg and lock the knee out. Hold for time if easy, return to N-sit if challenging once locked out. Repeat for repetitions and total time.
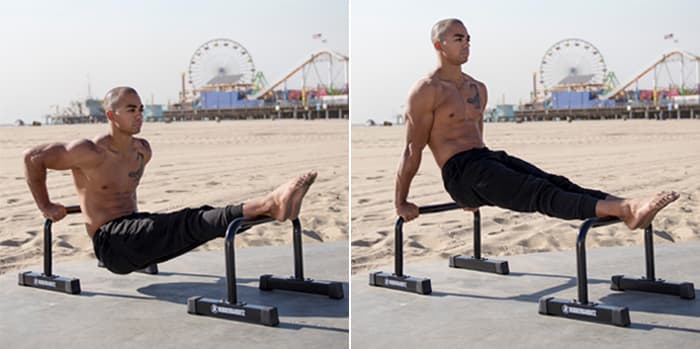
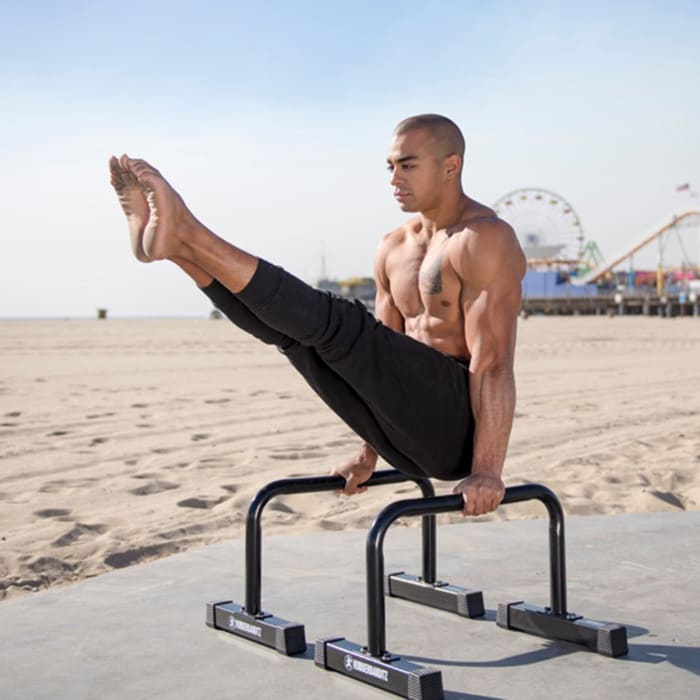
L-sit Instructions:
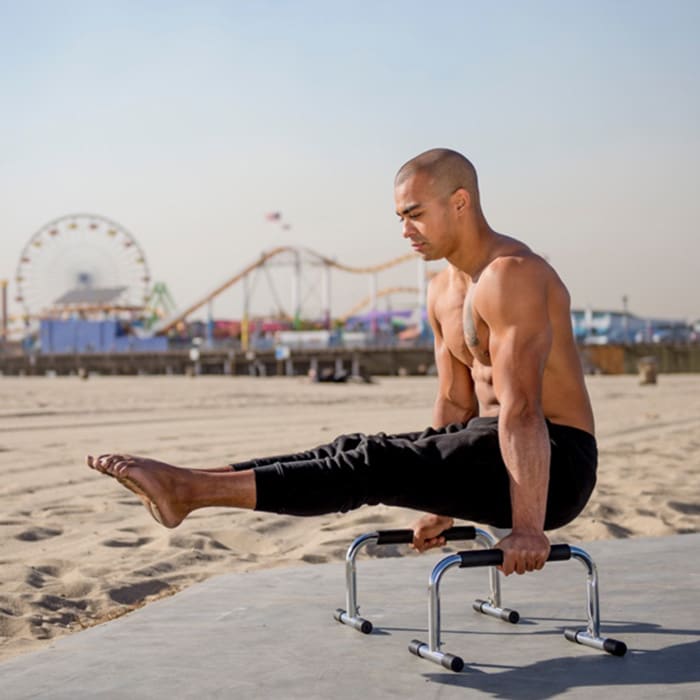
- Start with your hands gripping the parallettes, feet in front of you on the ground. Push down into the parallettes at all times, keeping your shoulders away from your ears.
- Bring both feet off the ground into an N-sit position.
- Maintaining the same shoulder position, extend both legs and lock the knees out. Hold for time if easy, return to N-sit if challenging once locked out. Repeat for repetitions and total time.
V-sit Instructions:
- Start with your hands gripping the parallette bars, feet in front of you on the ground. Push down into the parallettes at all times, keeping your shoulders away from your ears.
- Bring both legs off the ground into an L-sit position.
- Lean back into the shoulders and extend the hips as much as possible. Hold for time if easy, return to L-sit if challenging once locked out. Repeat for repetitions and total time.
Ready to L-Sit?
Pick your heavy duty parallettes or lightweight parallettes here.
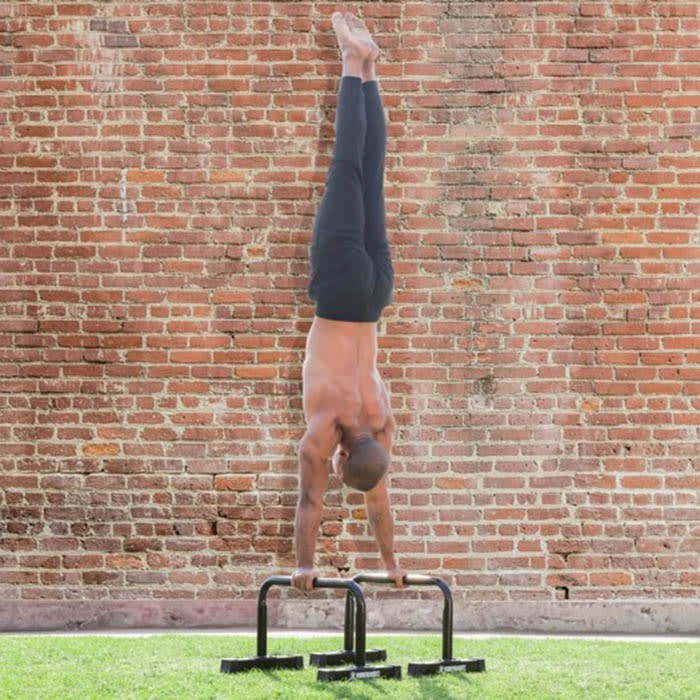
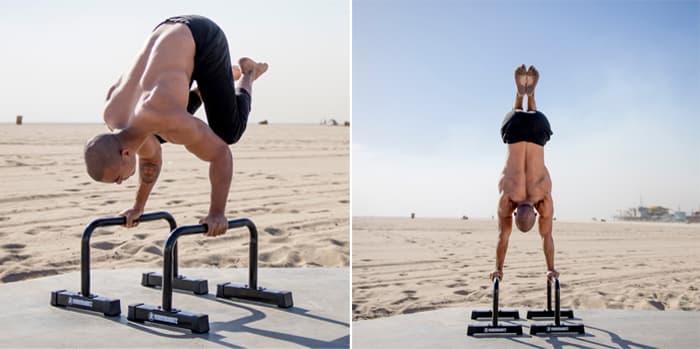
Handstand Progressions:
The handstand, contrary to popular opinion, is not about the abs but the traps and shoulders. Anyone with a decent handstand definitely has the boulder shoulder look going on. To get to a point where we can play around on the parallette bars, we need to spend ample time doing chest to wall, wrist conditioning, and basic balance drills. This will give us the prerequisite strength and balance we need to handstand. This is not just a two-day venture, it takes time. Don’t rush- setting up a strong base is necessary for these future steps to develop cleanly. Once we are happy to play on the parallettes freestanding, we would then look at the following ways to progress.
To avoid injury, you should ensure you are actively pushing into the floor and elevating the scapula. Beyond this, people argue about what cues are necessary and what are just preferences. We recommend lightly externally rotating the shoulders and keeping the quads somewhat active, but these are definitely preferences rather than necessities.
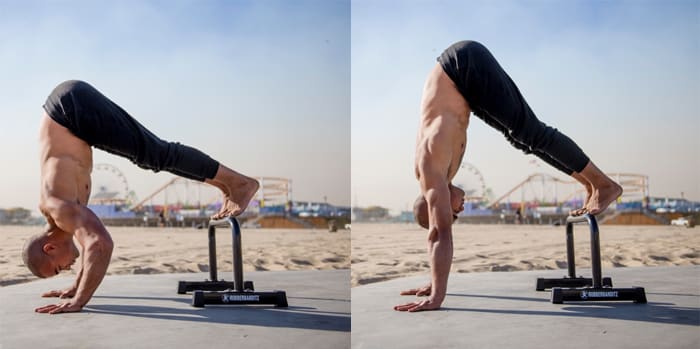
Parallettes Chest to Wall Handstand:
- Set up parallettes parallel and connected to a wall.
- Place both hands on the parallettes, thumbs close to, but facing away from the wall.
- Step your feet up the wall, holding a 45-60 degree angle if not confident with your ability to bring yourself closer to the wall. If comfortable, aim to have your hands as close to the wall as possible, maintaining the majority of the weight over the middle of the hands.
Parallettes Split leg Handstand:
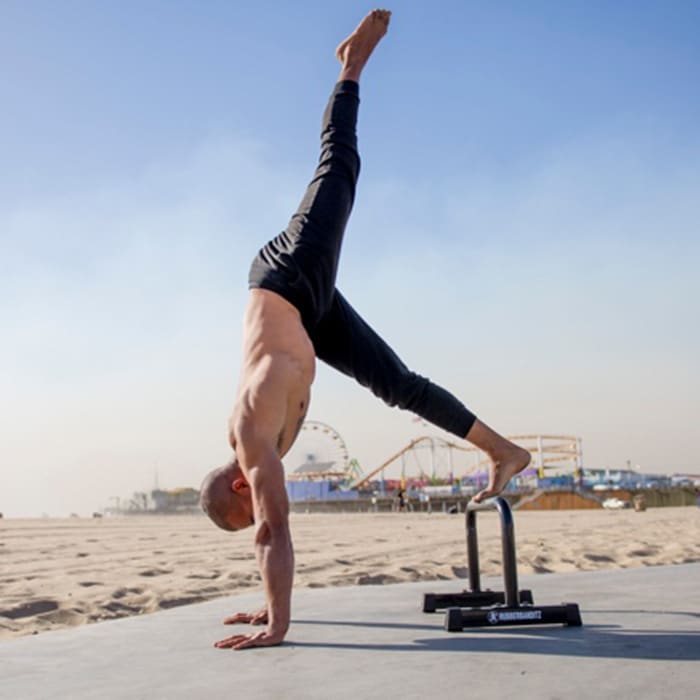
- Set up the parallette bars parallel and connected to a wall.
- Place both hands on the parallettes, thumbs about 20 inches away from the wall and facing towards the wall.
- Kick up to have feet touching the wall past your head.
- Split your legs and bring one leg slowly towards the ground and away from the wall. This should allow your foot to lightly float off the wall and give you a safe way to practice balancing on the parallettes.
Parallettes Handstand Tuck:
- Kick up into a handstand position with split leg entry (easier) or with legs together (harder).
- Draw your knees upward toward your stomach and tuck your feet in towards your butt.
- Find a way to keep the hips and shoulders over the midpoint of your hands.
- Keep your elbows fully extended as you find your equilibrium.
Ready to finally master that handstand?
Pick your heavy duty parallettes or lightweight parallettes here.
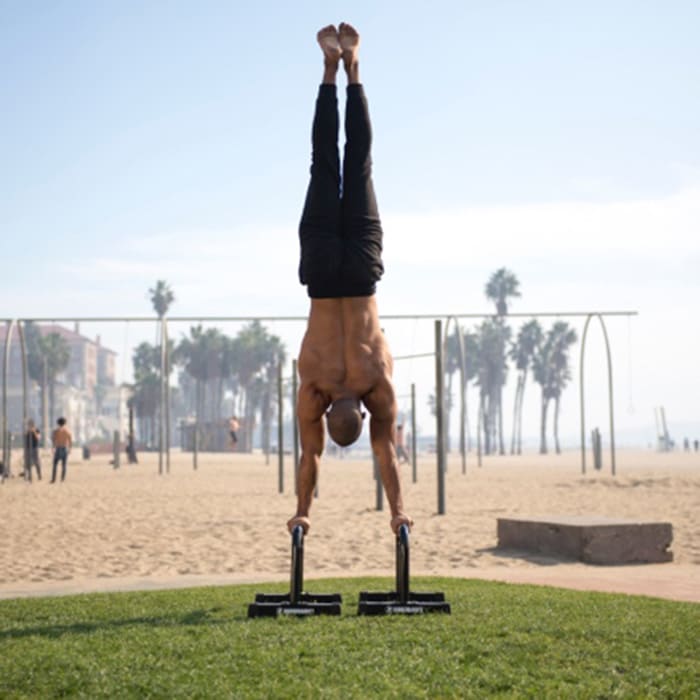
Paralettes Handstand
- Kick up into a handstand position with split leg entry (easier) or with legs together (harder).
- Find a way to keep the hips and shoulders over the midpoint of your hands (video side on to see where you are having issues if you are failing regularly).
- Catch heel-side falls by pushing down into the index finger side of your hands and catch toe side falls by breaking at the elbow or shoulder to redistribute weight.
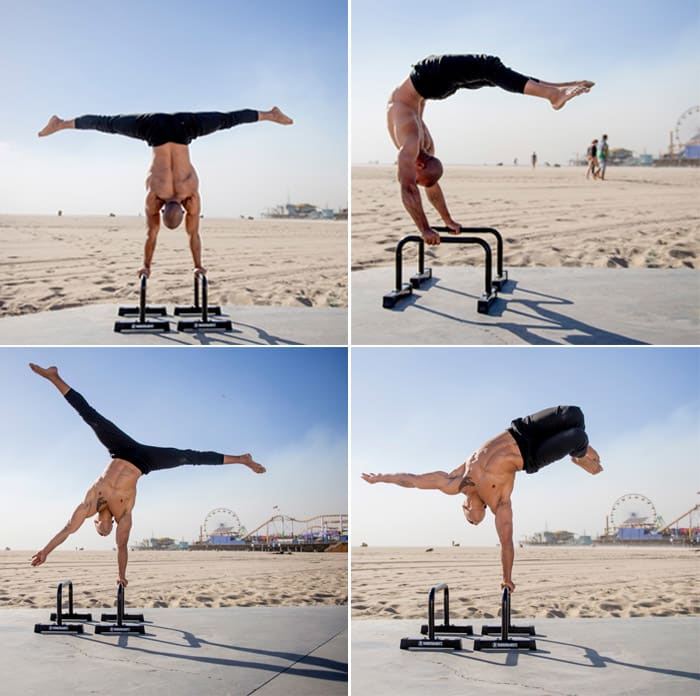
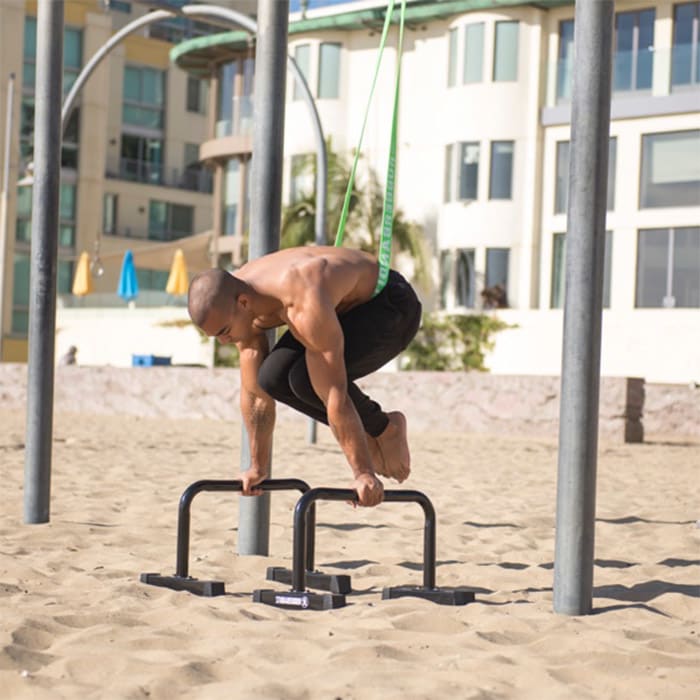
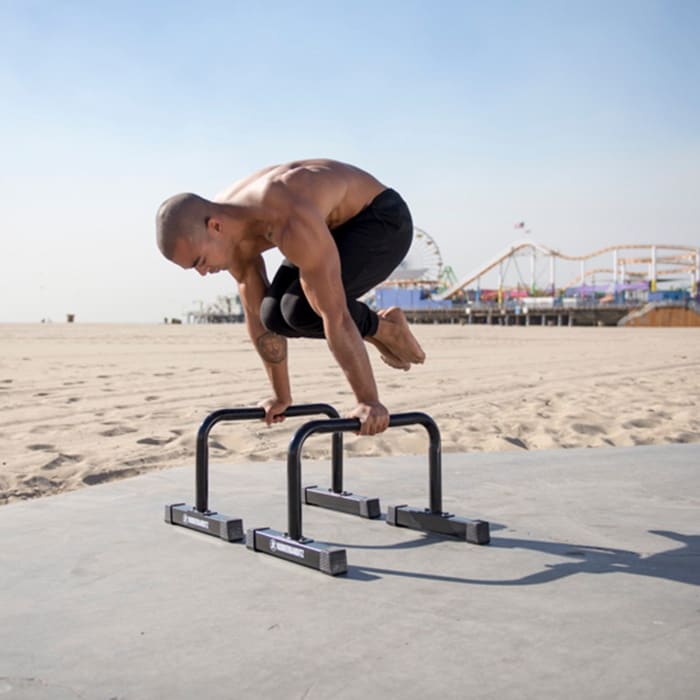
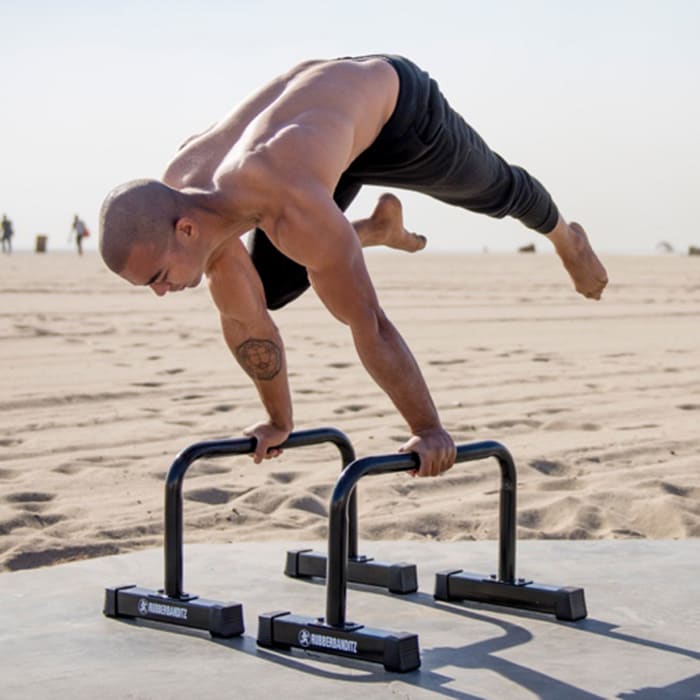
Planche Progressions:
The planche is what you and we most likely bought our parallettes for. It is, in both gymnastics and calisthenics, the gold standard for pushing strength and demands extreme scapular, chest and shoulder strength and often years of dedicated training. The planche is all about that lean! The more of your body you can get in front of your hands, the easier it is getting everything behind your hands off the ground. Let’s take a look at how to get there.
To ensure you are able to sustainably train planche, you should consider regularly conditioning the wrist in similar positions with challenging and uncomfortable, but not painful, loads. You are also encouraged to push into the ground to keep the scapula active, rather than sinking into the shoulders and relying on body structures like bones and ligaments to hold you up. Early on, you may also find it easier to tighten the rib to hip connection mentioned in the v-sit progressions, as scapula protraction tends to be more accessible with a hollowed core position.
The following exercises are quite useful for building the foundational strength to planche. Start with both feet on the ground, and then try one foot. Then bring the elevated knee forward. Hold each position until failure. The key is to build prolonged muscle endurance by staying in each static isometric contraction as long as possible.
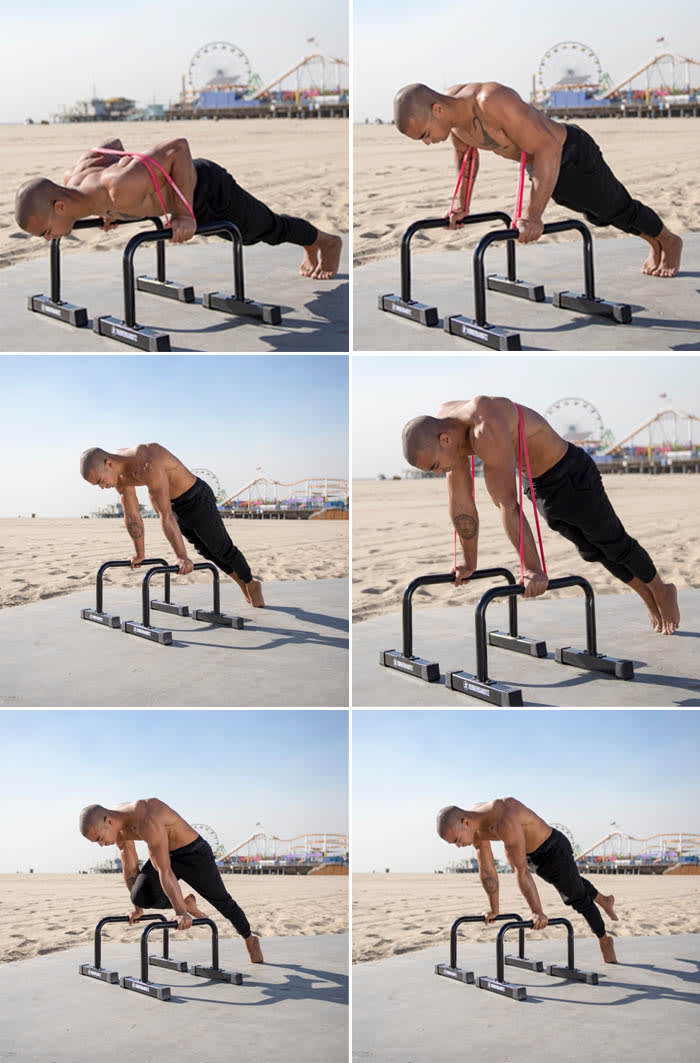
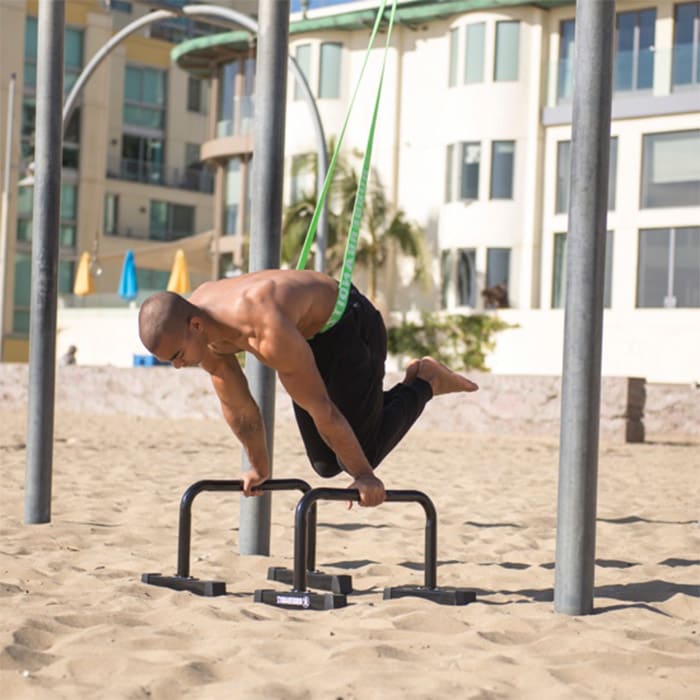
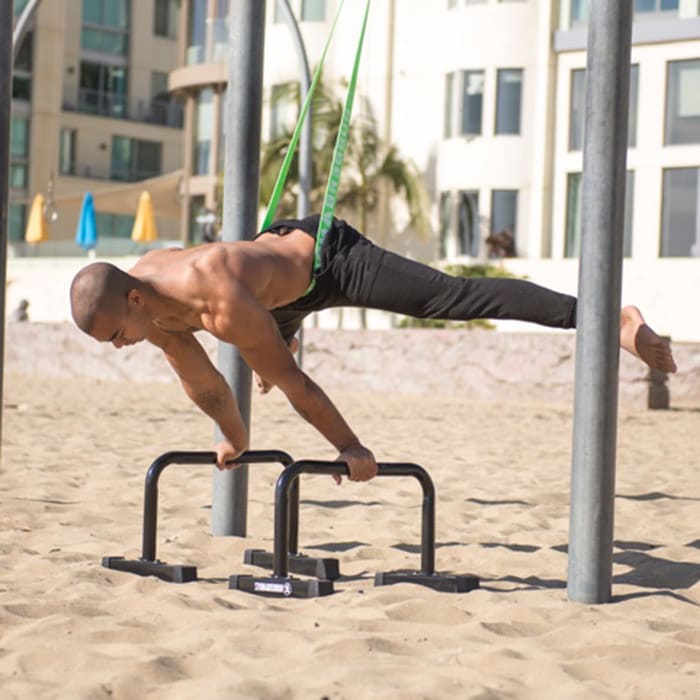
RubberBanditz Banded Tuck Planche:
- Loop the resistance band around your feet (easier) or hips (harder).
- Keeping your arms straight, lean so that your shoulders pass your hands. Push hard into the ground and lean, and your feet should come off the ground.
- Reduce band size as necessary, ensuring you are increasing hold times week to week.
Need a calisthenics resistance band for planche training? Click here
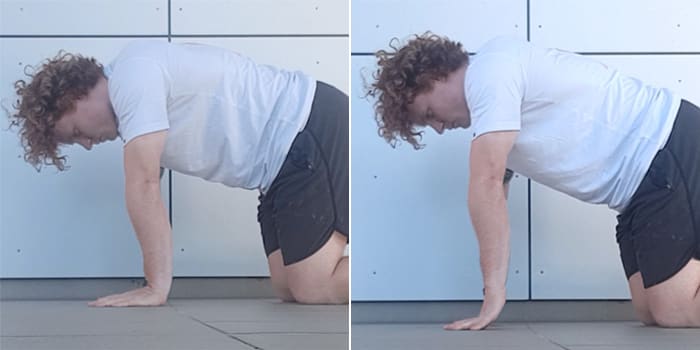
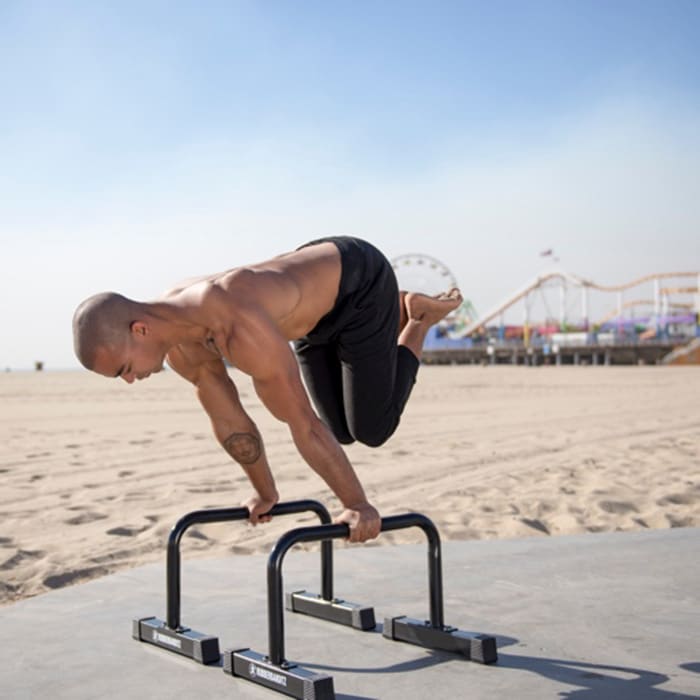
Tuck Planche:
- Start with your hands on the parallette bars, knees in between your hands.
- Lift the hips, keeping the feet on the ground as the knees lift.
- Lean forward and push into the ground until your feet are off the ground. Focus on maintaining and adding to the lean to ensure you get the most out of your sets.
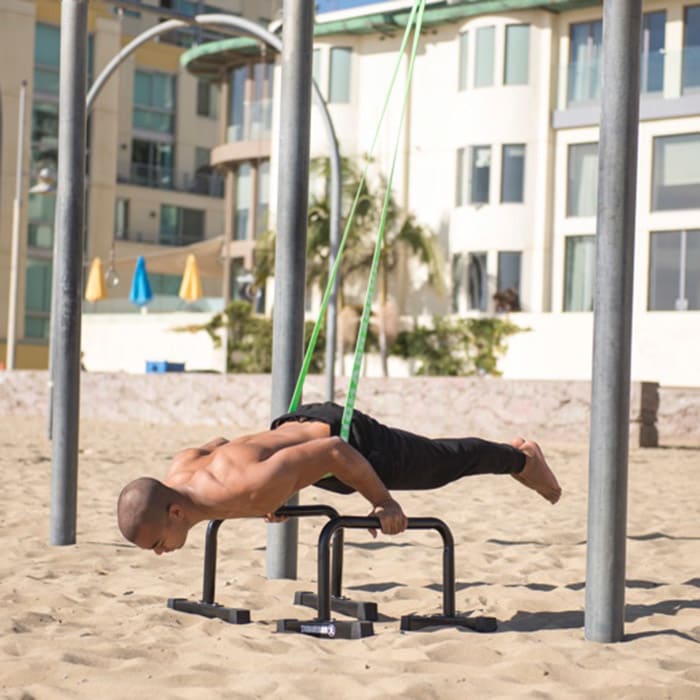
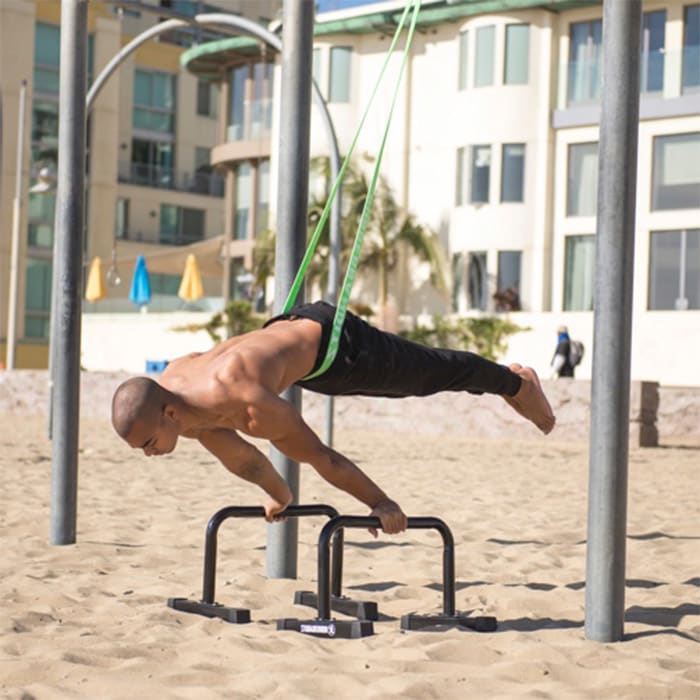
Banded Advanced Tuck Planche:
- Loop a resistance band around your feet (easier) or hips (harder).
- Keeping your arms straight, lean so that your shoulders pass your hands. Push hard into the ground and lean, and your feet should come off the ground. From here, straighten your back out and bring your legs past the line of your forearms.
- Reduce band size as necessary, ensuring you are increasing hold times week to week.
Advanced Tuck Planche:
- Start with your hands on the paralettes, knees in between your hands.
- Lift the hips, keeping the feet on the ground as the knees lift.
- Lean forward and push into the ground until your feet are off the ground. Straighten out your back and open the hips until the knees are past the forearms. Focus on maintaining and adding to the lean to ensure you get the most out of your sets.
Banded Bent-Arm Planche:
- Start with your hands on the ground, one knee between your hands and the other fully lengthened. Loop a band around your hips (easier) across your ribs (harder).
- Lift the hips, keeping the foot on the ground as the knees lift.
- Lean forward and push into the ground until your feet come off the ground. Focus on maintaining and adding to the lean to ensure you get the most out of your sets.
Click here if you need a band.
Half-lay Planche:
- Start with your hands on the ground, one knee between your hands and the other fully lengthened.
- Lift the hips, keeping the foot on the ground as the knees lift.
- Lean forward and push into the ground until your feet come off the ground. Focus on maintaining and adding to the lean to ensure you get the most out of your sets.
Banded Straddle Planche:
- Start with your hands on the ground, knees between your hands. Loop a band around your hips (easier) across your ribs (harder).
- Lift the hips, keeping the feet on the ground as the knees lift.
- Lean forward and push into the ground until your feet come off the ground. Open them out slowly into a straddle position as you lean further forward. Focus on maintaining and adding to the lean to ensure you get the most out of your sets.
Straddle Planche:
- Start with your hands on the ground, one knee between your hands and the other fully lengthened. Loop a band around your hips (easier) across your ribs (harder).
- Lift the hips, keeping the foot on the ground as the knees lift.
- Lean forward and push into the ground until your feet come off the ground. Focus on maintaining and adding to the lean to ensure you get the most out of your sets.
Banded Full Planche:
- Start with your hands on the ground, knees between your hands. Loop an exercise band around your hips (easier) across your ribs (harder).
- Lift the hips, keeping the feet on the ground as the knees lift.
- Lean forward and push into the ground until your feet come off the ground. Extend them straight to find yourself in a full planche position, ensuring your hips aren’t too heavily piked (if they are, work more straddle planche with extra lean). Focus on maintaining and adding to the lean to ensure you get the most out of your sets.
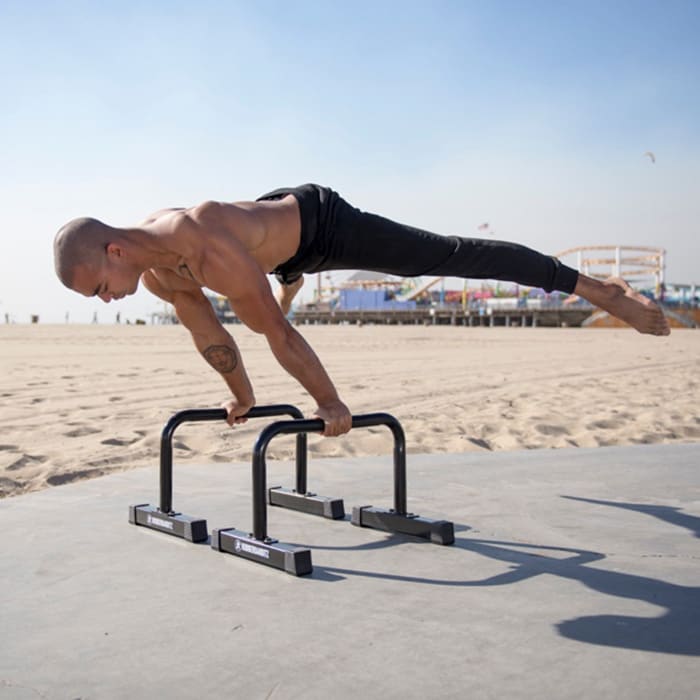
Full Planche:
- Start with your hands on the ground, knees between your hands.
- Lift the hips, keeping the feet on the ground as the knees lift.
- Lean forward and push into the ground until your feet come off the ground. Extend them straight to find yourself in a full planche position, ensuring your hips aren’t too heavily piked (if they are, work more straddle planche with extra lean). Focus on maintaining and adding to the lean to ensure you get the most out of your sets.
Got what it takes to advance your planche progressions?
Pick your heavy duty parallettes or lightweight parallettes here.
Programming:
The best programming recommendations we can give to everyone would suit a push day focused on the parallettes that target v-sit and planche and squat variations like pistols squats, dragon squats and shrimp squats, with an alternate back workout focused on pull ups, rows, front levers and hamstring work, like banded Romanian deadlifts. We recommend doing two push and pull workouts each in a week, with two to three upper body and lower body exercises per day, three to five working sets per exercise and a variation that you can manage 5-15 repetitions of, or 4-15 seconds if it is an isometric hold, with most of the work being done between the 5-9 second range (handstands excluded).
For the L sit and planche variations, you will find that once you can hold a progression for more than 8 seconds for more than 3 sets, you can likely progress to the next variation at some level. The same goes for banded work- you can reduce the resistance of the band when you are able to manage 3 sets of more than 8 second holds.
As for handstands, working with a progression you can manage more often than not is a good place to start. Many people see themselves being able to hold a chest to wall for a minute and assume that means they can now practice free-standing. Don’t rush it. We find that people often struggle, and need more time practicing the split leg handstand variation, as they do not know how to balance or correct balance, despite having the base strength and mobility likely needed for a handstand.
An example workout might look like this for a beginner-intermediate athlete:
Push Day:
A1 Banded Advanced Tuck Planche: 3x6s Holds
A2 Pistol Squat Variation: 4x6-8/side
B1 Half-Lay L Sit: 4x8s holds
B2 Banded Squat: 4x10
C1 Paralettes Handstand: 3x30s
C2 Bulgarian Split Squat: 3x8/side
To your new journey, set of parallettes, and eventual v sit, handstand and planche
XXXOO
Rubberbanditz Team